CrowdStrike issue impacting Windows endpoints causing an 0x50 or 0x7E error message on a blue screen
-
Hold the power button for 10 seconds to turn off your device and then press the power button again to turn on your device.
-
On the Windows sign-in screen, press and hold the Shift key while you select Power > Restart.
-
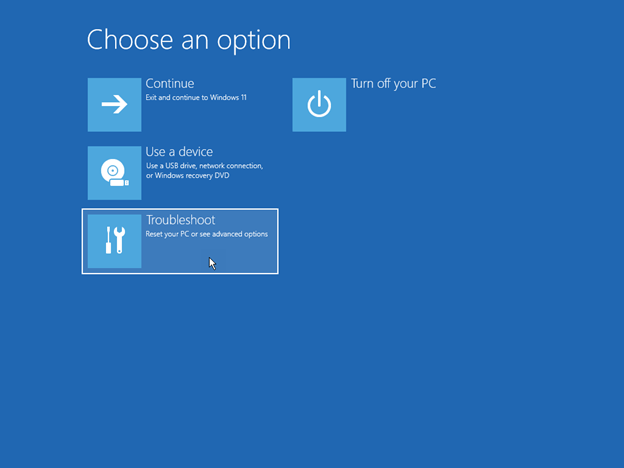
After your device restarts to the Choose an option screen, select Troubleshoot.
-
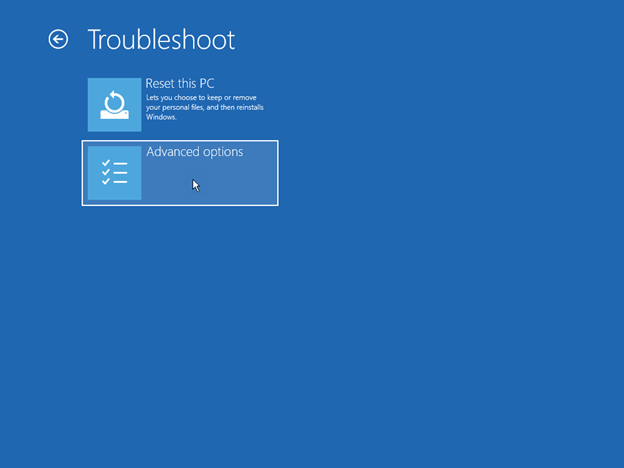
On the Troubleshoot screen, select Advanced options > Startup Settings > Enable safe mode.
-
Restart your device.Note You may be asked to enter your BitLocker recovery key. When the device restarts, continue pressing F4 and then it will log you in to safe mode. Please note, for some devices, you need to press F11 to log in through safe mode.
-
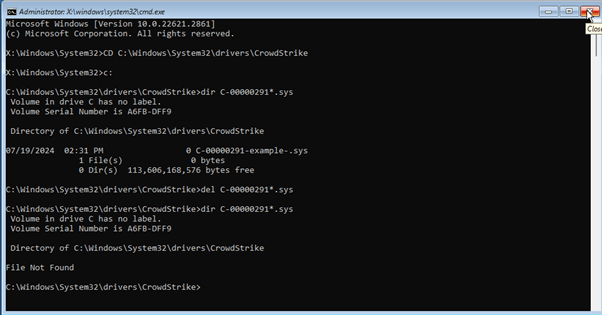
Once in safe mode, right-click Start, click Run, type cmd in the Open box, and then click OK.
-
If your system drive is different than C:\, type C: and then press Enter. This will switch you to the C:\ drive.
-
Type the following command and then press Enter:
CD C:\Windows\System32\drivers\CrowdStrike
Note In this example, C is your system drive. This will change to the CrowdStrike directory.
-
Once in the CrowdStrike directory, locate the file matching “C-00000291*.sys”. To do this, type the following command and then press Enter:
dir C-00000291*.sys
-
Permanently delete the file(s) found. To do this, type the following command and then press Enter.
del C-00000291*.sys
-
Manually search for any files that match “C-00000291*.sys” and delete them.
-
Restart your device.
Recovery methods
If you receive the Windows Recovery screen, use one of the following methods to recover your device.
Method 1: Use Enable safe mode
-
Hold the power button for 10 seconds to turn off your device and thenpress the power button again to turn on your device.
-
On the Windows sign-in screen, press and hold the Shift key while you select Power > Restart.
-
After your device restarts to the Choose an option screen, select Troubleshoot > Advanced options > Startup Settings > Enable safe mode. Then, restart your device.Note You might be asked to enter your BitLocker recovery key. When the device restarts, continue pressing F4 and then it will log you in to safe mode. Please note, for some devices, you need to press F11 to log in through safe mode.
-
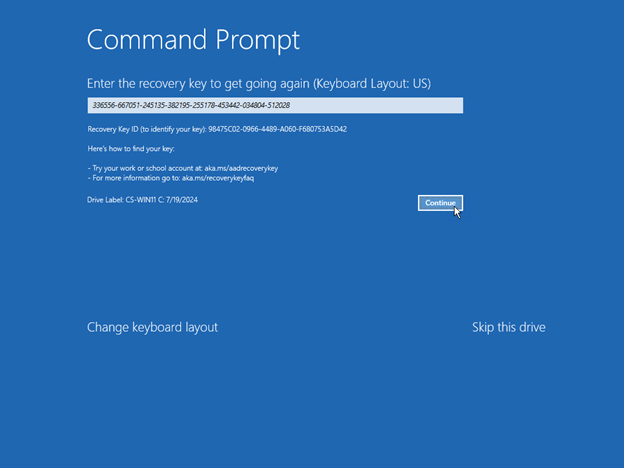
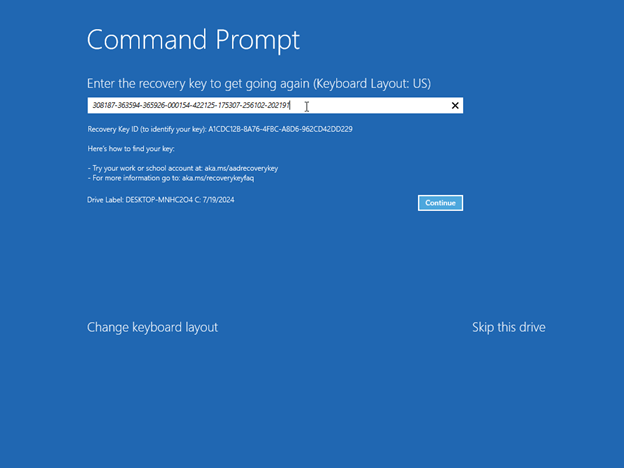
If the screen asks for a BitLocker recovery key, use your phone and log on to https://aka.ms/aadrecoverykey. Log on with your Email ID and domain account password to find the BitLocker recovery key associated with your device.To locate your BitLocker recovery key, click Manage Devices > View Bitlocker Keys > Show recovery key.
-
Select the name of the device where you see the BitLocker prompt. In the expanded window, select View BitLocker Keys. Go back to your device and input the BitLocker key that you see on your phone or secondary device.
-
When the device restarts, continue pressing F4 and then it will log you in to safe mode.
-
Once in safe mode, right-click Start, click Run, type cmd in the Open box, and then click OK.
-
If your system drive is different than C:\, type C: and then press Enter. This will switch you to the C:\ drive.
-
Type the following command and then press Enter:
Tip: CD C:\Windows\System32\drivers\CrowdStrike
Note In this example, C is your system drive. This will change to the CrowdStrike directory.
-
Once in the CrowdStrike directory, locate the file matching “C-00000291*.sys”. To do this, type the following command and then press Enter:
dir C-00000291*.sys
-
Permanently delete the file(s) found. To do this, type the following command and then press Enter.
del C-00000291*.sys
-
Manually search for any files that match “C-00000291*.sys” and delete them.
-
Restart your device.
Method 2: Use System Restore
-
Hold the power button for 10 seconds to turn off your device and then press the power button again to turn on your device.
-
On the Windows sign-in screen, press and hold the Shift key while you select Power > Restart.
-
After your device restarts to the Choose an option screen, select Troubleshoot > Advanced options > System Restore.
-
If the screen asks for a BitLocker recovery key, use your phone and log on to https://aka.ms/aadrecoverykey. Login with your email id and domain account password to find the bit locker recovery key associated with your device.To locate your BitLocker recovery key, click Manage Devices > View Bitlocker Keys > Show recovery key.
-
Select the name of the device where you see the BitLocker prompt. In the expanded window, select View BitLocker Keys. Go back to your device and input the BitLocker key that you see on your phone or secondary device.
-
Click Next on System Restore.
-
Select the Restore option in the list, click Next, and then click Finish.
-
Click Yes to confirm the restore.Note This will perform just the Windows system restore and personal data should not be impacted. This process might take up to 15 minutes to complete.
Hot Sale Products

MS Windows 10 Pro CD-KEY GLOBAL
R$ 276.37 R$ 78.00

MS Office2016 Professional Plus CD Key Global
R$ 1,404.61 R$ 126.75

MS Windows 11 Pro CD-KEY GLOBAL
R$ 1,128.15 R$ 107.25

Microsoft Windows 11 Home CD-KEY GLOBAL
R$ 1,353.77 R$ 107.25

Office2019 Professional Plus CD Key Global
R$ 1,414.75 R$ 156.00